$70 SDVX Controller
In my neverending quest to play more rhythm games, I discovered SDVX/kshootmania. Unfortunately there really is no good way to play these without a controller. An expensive investment, you’re looking at over $200AUD shipped. Not something I want to spend for a game I may not even like!
This is a work in progress. If you find this on Google and it helps you, leave a comment to inspire me to polish it and post pictures when I complete my setup.
Working off this guide, I’ve made several changes…
All prices in AUD, so if you work in USD, prepare for a happy discount :)
Parts list
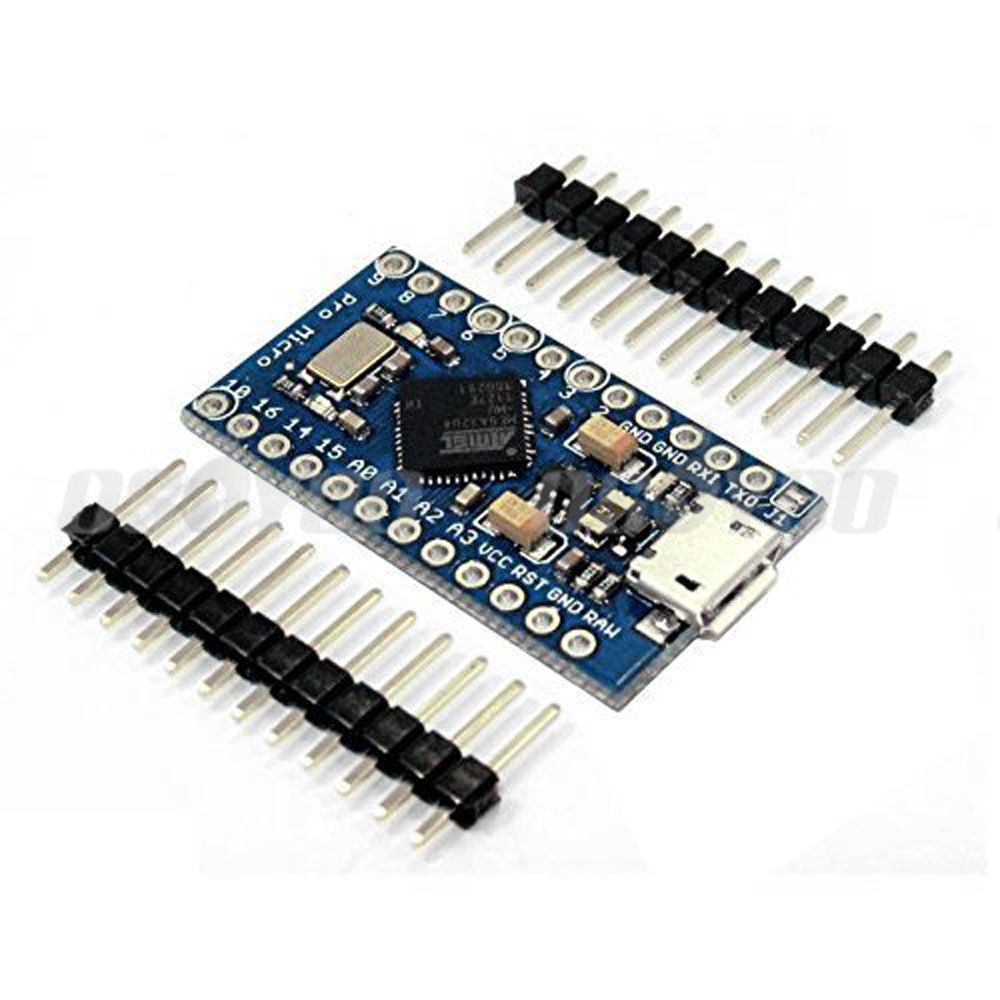
- Leonardo Pro Micro, $6. Search on eBay for a seller. Should look like this:
- Sheet of MDF. Cost me $6 at Bunnings. I wouldn’t go under 6.5mm thick otherwise it flexes too much. Also acceptable is plywood and possibly acrylic.
- The switches themselves. “9x Beatmania IIDX Video Game DIY Parts LED Illuminated Rectangular Push Button”. $37 from eBay.
- Aluminium knobs: $17.50. These are completely overkill but they feel wonderful in my hands. You can probably find much cheaper ones on aliexpress.
- Encoders. The ones listed in the pancake guide are wrong! The don’t have threads so can’t easily be attached to the board. I got these instead. $5.20. After using them for a while, these really aren’t amazing encoders. The next step up are 600ppr ones, which are somewhat insane. See the “upgrades” section.
Total: $70-ish (AUD)
I had these parts lying around, but you may need to buy them:
- Female header pins (2.54mm)
- Male to female jumper cables (listed as “breadboard jumpers” on ebay usually)
- 150 ohm resistors
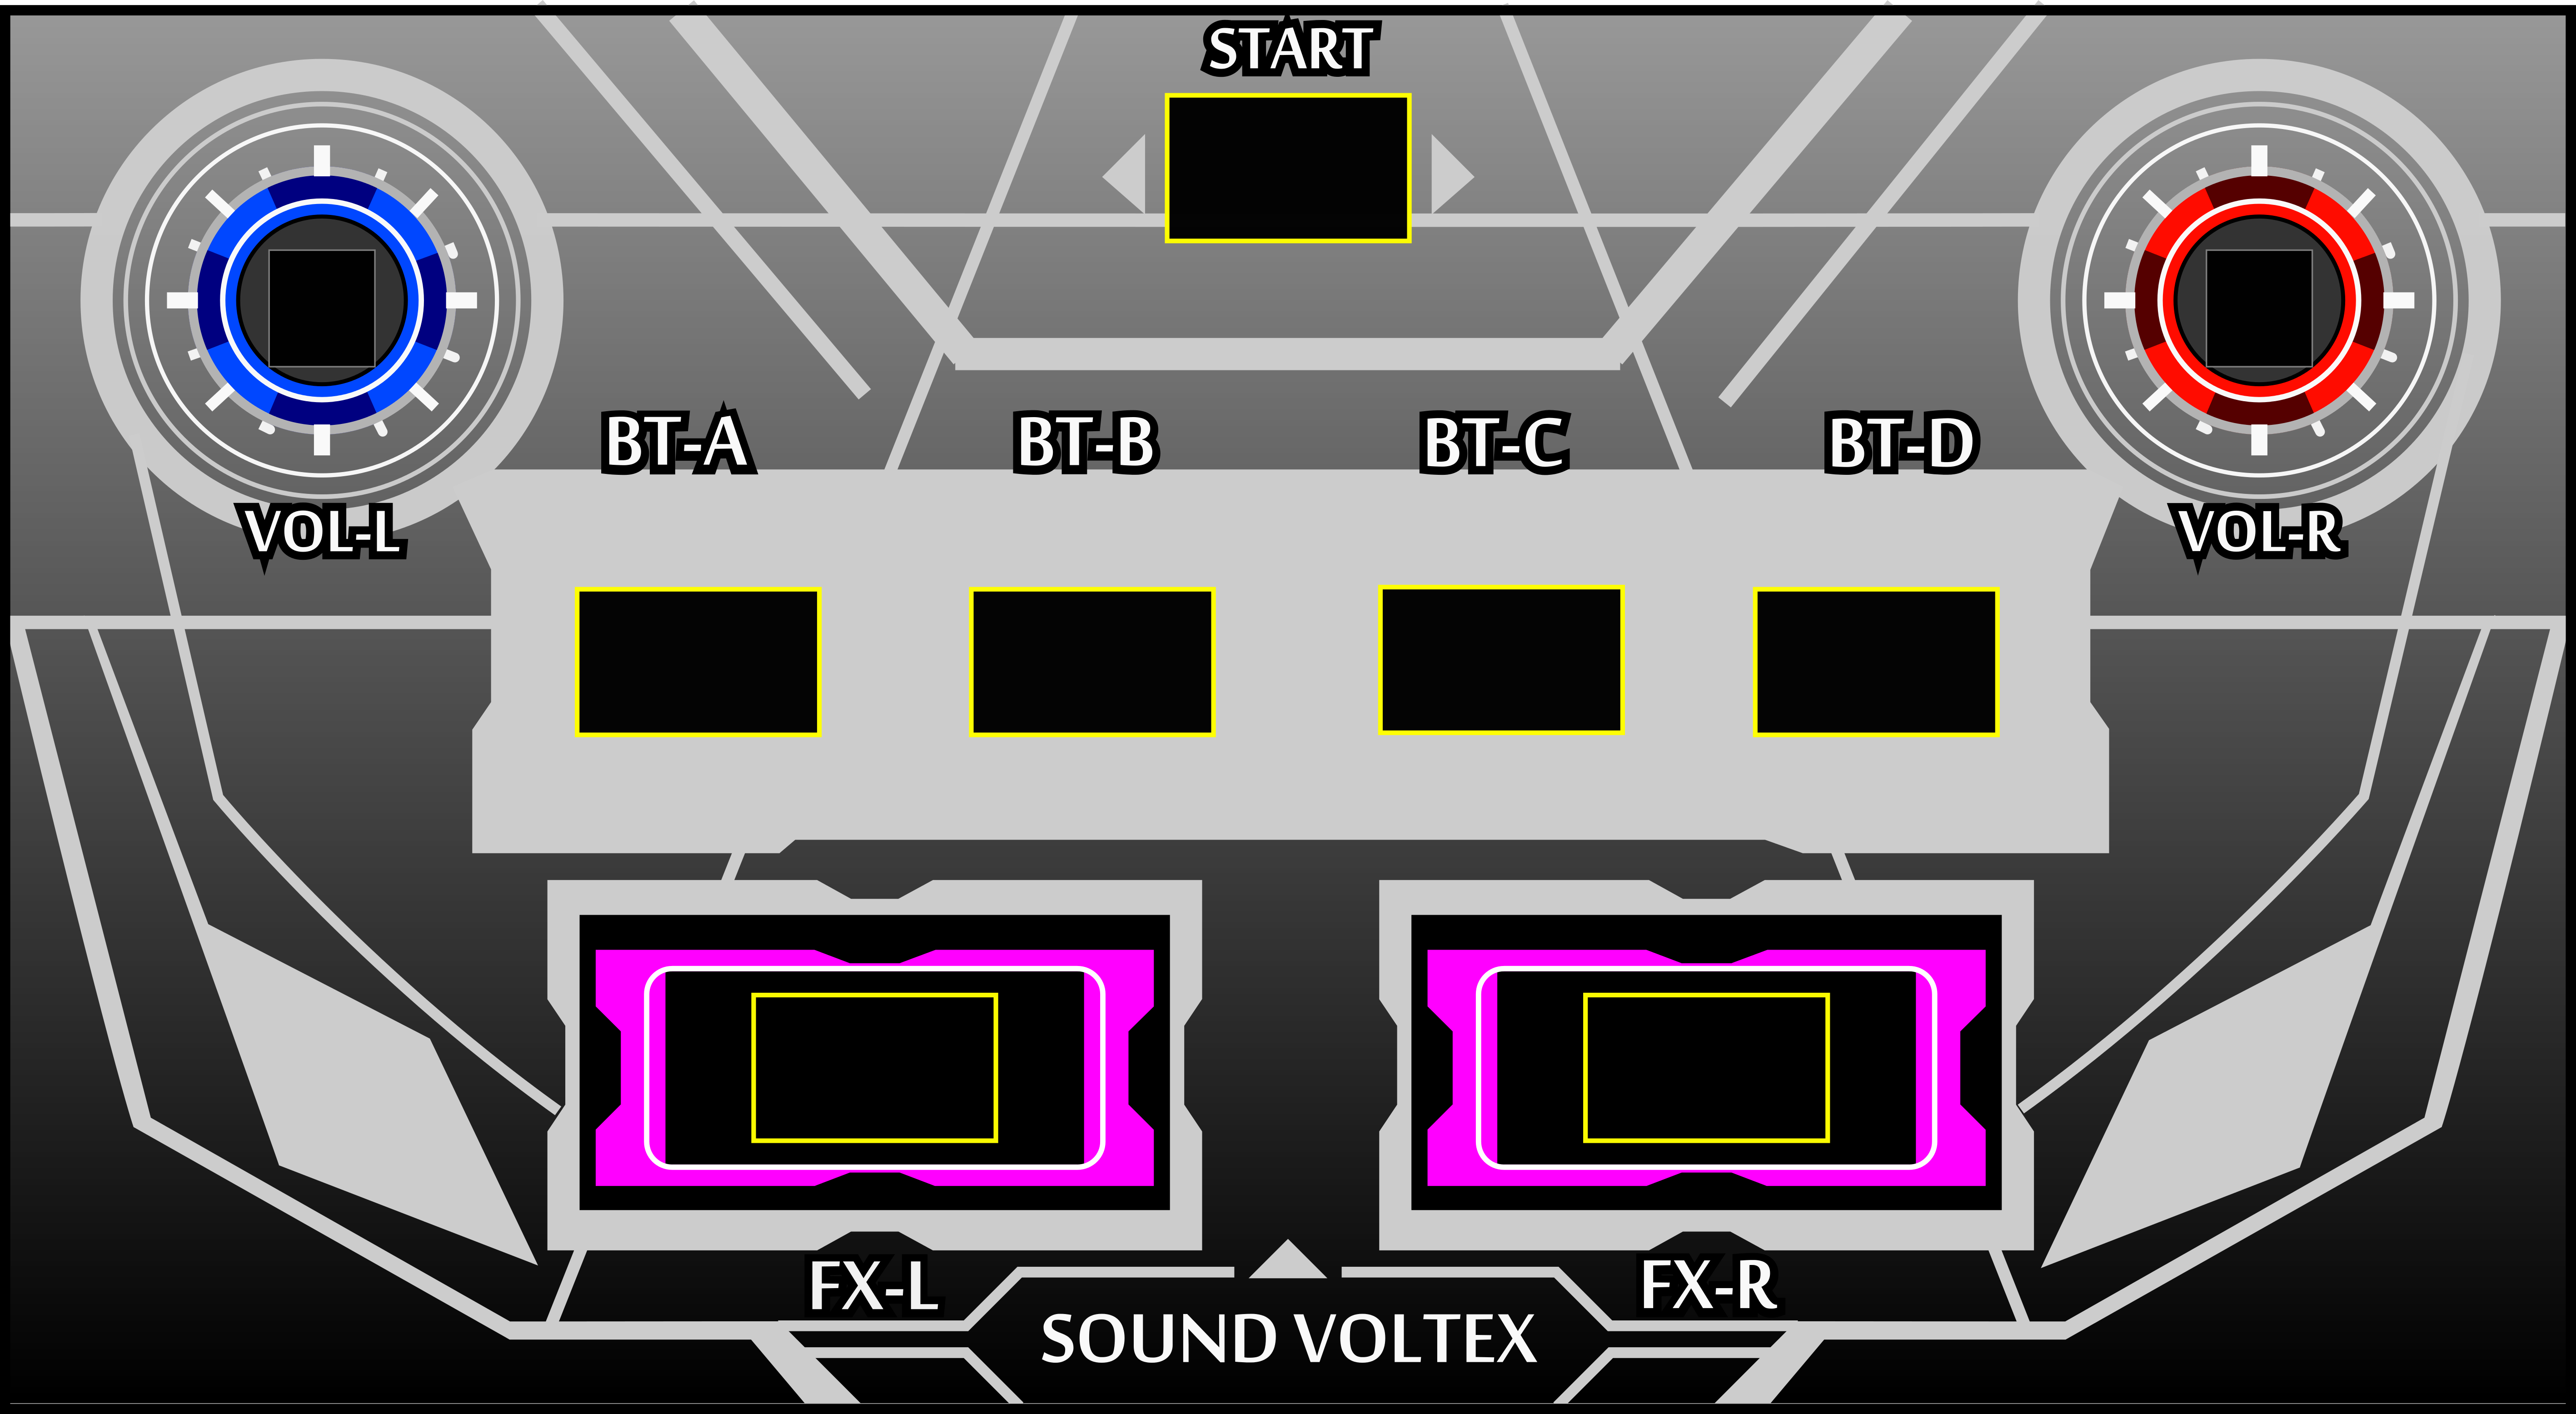
Make a box
The arcade templates on Pancake were far too big for my liking - I want this as compact as possible whilst maintaining decent arcade styling. I shortened everything.

The VOL squares are not centered, you will have to mark these with a pencil when you make the cut.
I printed this out on A4, glued the parts together, then used it for my hole drilling.
Here also is the svg file and high res png. I also have a pdf - if you print with Acrobat reader there’s options to tile it onto 2 sheets of A4.
12v to 5v LED conversion
If you can find switches with 5V LEDs already inside, buy them, this will save you some effort. Take out all the LEDs from their holders, desolder the existing resistors, and solder in your 150 ohm resistors. This means we can drive the LEDs directly from the MCU with no extra hardware! Very convenient.
Firmware
Sorry, Pancake man, but your code was bad. I’ve reworked it to run better and be more configurable. Get it here. For best encoder performance, make sure the encoder pins are 0, 1, 2, 3. Any order is fine, just as long as you use those pins. All other pins you’re free to use whatever you want!
Wiring
Common ground across everything, then switch + LED connectors for each button, and A/B for each encoder.
Future upgrades
The switches are insanely heavy. I’ve bought some 50g omrons. Expensive, however! Cost me $37 shipped to Australia. You could probably get big square switches.
The encoders are kinda crap. I found some arcade quality 600PPR ones, 2 cost me $27. Here’s a link, but I highly recommend just searching ebay for “encoder 600 6mm”. I saved $10 by searching and finding the cheapest for my location.
Comments